Green fluorescent music spectrum LED light audio level indicator light for car player lighting atmospheric light


Description
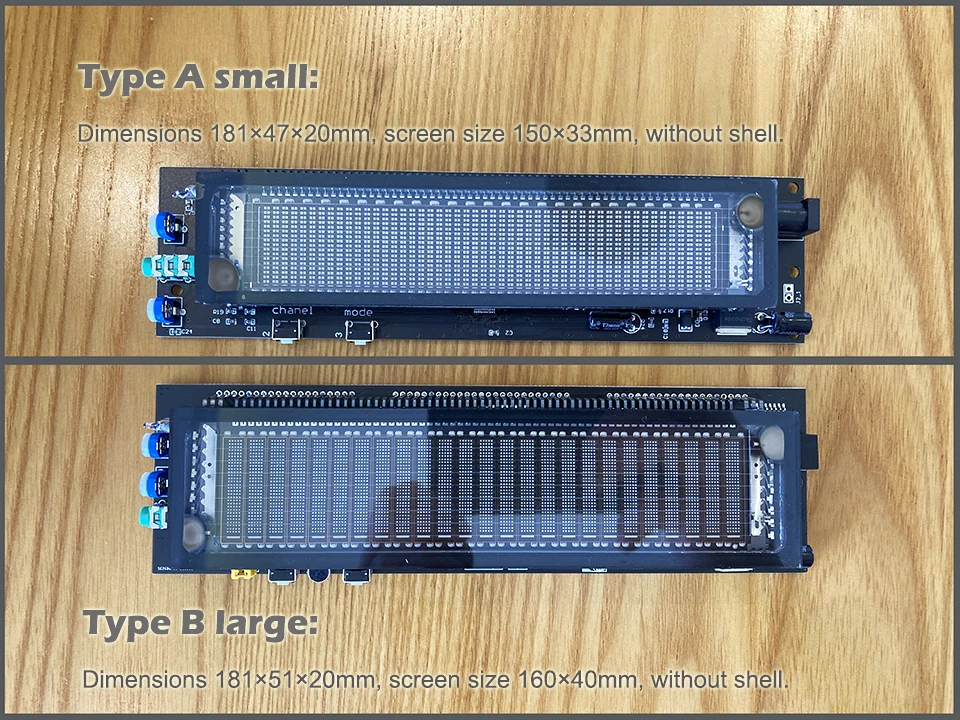
Purchase guide:
Type A small: Dimensions 181×47×20mm, screen size 150×33mm, without shell.
Type B large: Dimensions 181×51×20mm, screen size 160×40mm, without shell.
Type A with shell: with acrylic shell.
Type B with shell: with acrylic shell.
Without power supply: Without power supply.
American standard plug: power supply with American standard plug +3.5mm one-to-two converter.
European standard plug: power supply with European standard plug +3.5mm one-to-two converter.
The scope of products:
Home audio modification or DIY, car modification, computer modification, can only be used in indoor and non-high frequency vibration places.
(screen 35mm*150mm, display size 26*135mm, driver board 181*47mm)
New upgrade (the black PCB below is new, the position of the single and dual channel switch button has been changed, the mode switch button has been added, and the clock function has been added.)


The effect after installing the shell
The shell is made of acrylic, thickness: 28.7mm, width: 76.5mm, length: 205mm.

There are three colors on the screen. The borders on both sides are orange, the bottom is creamy white horizontal bars, and the part showing the spectrum in the middle is green. If you want to display white, use a brown-red light shield.

Red dial switch function:
DIP switch 1: The function is to switch the floating point display;
DIP switch 2: The function is to switch between split-screen dual-channel display or full-screen single-channel display.

Wiring method
1. Shared power supply, no need to connect to GND
2. Independent power supply, connect to GND
3. Two-channel display needs to connect Rin and Lin
4. For mono display, Rin and Lin need to be connected in parallel and connected to the power amplifier Rin-out or Lin-out


Wiring note: It is strongly recommended that the power supply is 12V DC.
The audio input is the audio in terminal and GND, which is compatible with the audio output of general equipment, and the output is also a pair of audio out and GND. It is strongly recommended to connect one of the power output wires of the speaker. This PCB audio The input GND and the GND of the 5V power supply are connected. If it is installed in the device, it is necessary to ensure that the GND of the power supply and the GND of the output audio are also the same or completely isolated.
Note: If AC power is supplied, please convert to DC and supply power independently. When DC power is supplied, the GND needs to be the same as the audio GND.
Please read the words on the PCB and confirm that it is correct before turning on the power.
Some speakers have BTL output or use Class D functions, and there is no grounding terminal at both ends of the speakers, can it? The answer is yes, there are two situations for this wiring method. (The first type is to use a power supply that shares the ground wire with the power amplifier, such as a car. At this time, you can connect any speaker wire to Lin or Rin, and you don’t need to connect it to GND.) (The second type uses a separate power supply. At this time, the power supply and the power supply of the speaker amplifier are isolated. Connect any wire of the speaker and the GND of the amplifier to the Lin and GND of the screen. If only one speaker is connected, connect the two speaker wires directly to the screen. Lin and GND are also available.)
Common problem:
Some users say that there is a bright light at the bottom of the screen when there is no music. It is suspected that it is a quality problem. In fact, this is not a quality problem. It is caused by the user's music signal being not pure enough. It is generally due to the use of impure power, including the notebook. The 12V power input of the phone, or digital audio equipment like Bluetooth speakers, USB speakers, etc. The audio of this type of equipment contains a lot of fundamental noise, and some low-end products can be heard directly from the speakers. Judging whether it is external noise is actually very simple, just short the input terminal to ground, and there should be nothing displayed on the screen at this time.
Characteristics
Color: Type A small